Restore missing project database instance via attaching an .MDF file or System Information Collector (SIC)
One may encounter this scenario, where a project instance is absent from the database and cannot be opened in the Engineering Studio.
This may happen if, for example, you uninstall zenon and did not create a project backup.
This may happen if, for example, you uninstall zenon and did not create a project backup.
NOTE: It is highly recommended and important to create project backups of your zenon Projects on a consistent basis.
However, you can attach your projects to the database via an .MDF file.
Your database files of your projects are stored locally in C:\ProgramData\COPA-DATA\SQL2022 (zenon 14).
Older versions of zenon (10, 11, 12) use SQL 2019 and therefore the path is C:\ProgramData\COPA-DATA\SQL2019.
Here, you will find your project GUIDs (Globally Unique Identifier). Each project has a unique number assigned to it.
Older versions of zenon (10, 11, 12) use SQL 2019 and therefore the path is C:\ProgramData\COPA-DATA\SQL2019.
Here, you will find your project GUIDs (Globally Unique Identifier). Each project has a unique number assigned to it.
To identify the missing project's GUID, you can create a full recording of your system by using our System Information Collector tool (short: SIC).
You can find the SIC in the Startup-Tool under the Tab Tools.
Start the SIC and begin a full recording of your system.
Once the SIC is done recording, your whole system information will be displayed in the tool.
On the left side of the tool, you can find the directory tree.
Navigate to Platform > Versions > Version ..... > SqlConnection > Projects (click on the folder).
On the left side of the tool, you can find the directory tree.
Navigate to Platform > Versions > Version ..... > SqlConnection > Projects (click on the folder).
As we can see, two projects are present on our hard drive locally but missing in the database. Missing projects are marked with a red background and a plus symbol.
We can try clicking the plus symbol displayed next to the project name to attach the project to the database.
Reboot your PC afterwards.
If this step does not work, we at least now know the GUID and path of the missing project.
Now, open SQL Server Management Studio to edit the database.
(If SSMS isn't installed on your machine, you can find the installer in the zenon .ISO in AdditionalSoftware\Microsoft SQL Server Management Studio)
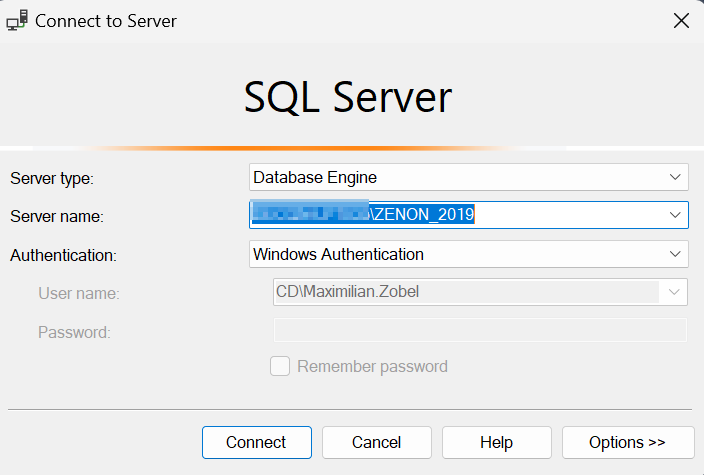
Log into the database.

In your Object Explorer, right-click on the folder 'Databases' and select Attach... in the context menu:

A dialog window will come up. Click Add... to add your .MDF-file.
Head to the correct folder with the GUID. The .MDF-file is located in the subfolder 'SQL'. Locate the file and click OK.
The instance should now be there in the Object Explorer.
Reboot your PC afterwards.
NOTE: Depending on your user privileges, you may encounter an error message due to user rights. In that case, either run SSMS as an administrator or move the folder with the GUID to Public Documents in C:\Users\Public.
After rebooting your PC, open the Engineering Studio. In the navigation bar click File > Insert existing project...
Your project should now be visible in the list again.
If your project still isn't visible, try updating the list by clicking "Update List".
Related Articles
a project with missing mdf file is still displayed as OK in the System information Collector
Summary Even though a project's mdf file is missing (which means the database is invalid), SIC still displays the project with green background and a check mark, indicating that there is no problem. Further more it is not possible to detach the ...Checklist: Data Missing in Service Engine
Time estimate: 60 minutes Please go through all the points in the following checklist. If necessary, confirm with IT Department any information you cannot verify before contacting your local COPA-DATA Representative. Checklist usage: #. [Quick hints] ...FAQ: How can I collect and display diagnostic data of a device with System Information Collector?
System Information Collector (SIC) is a version-independent tool that effortlessly collects and displays diagnostic data of all zenon Software Platform products and relevant operating system information. When a product of the zenon Software Platform ...Checklist: Workspace/Project cannot be created, loaded or backed up
Time estimate: 30 minutes Please go through all the points in the following checklist. If necessary, confirm with IT Department any information you cannot verify before contacting your local COPA-DATA Representative. Checklist usage: #. [Quick hints] ...SQL connection error descriptions are not displayed when opening a saved SIC file in the System Information Collector
Summary After a scan with the System Information Collector, it may provide detailed information about the reason for a SQL connection issue. However, after storing the SIC file and opening it again, these details are lost. Description After a scan ...